Creating a professional YouTube studio out of your attic may sound like a daunting task, but it’s actually a thrilling opportunity for DIY creators. As the world of online content continues to expand, having a dedicated space for filming can make all the difference in your video quality and overall productivity. This post is here to guide you through turning that underutilized attic into a vibrant workspace that reflects your personality and meets your creative needs.
If you’re a budding YouTuber or a passionate creator, you likely understand the importance of having a functional and inspiring space to film. Whether you’re making tutorials, vlogs, or DIY projects, a well-set-up attic can become a haven for your creative expression. This guide is tailored for you—those who want to elevate their YouTube game without breaking the bank. With these ten actionable ideas, you’ll learn how to optimize your attic for filming, ensuring you capture stunning videos that engage and wow your audience.
By the end of this post, you’ll have practical tips to transform your attic into a fully-fledged YouTube studio. From optimizing lighting and choosing the perfect color palette to soundproofing and personalizing your backdrop, you’ll discover how to create a space that not only works for filming but inspires you to keep creating. Get ready to bring your attic to life and unleash your full creative potential!
Key Takeaways
– Optimize Lighting: Bright and soft lighting can significantly enhance your video quality, making your content more appealing to viewers. Explore window treatments and artificial lighting to create the perfect setup.
– Choose Your Color Palette: Colors affect mood and engagement. Select a palette that complements your brand and resonates with your audience, ensuring a cohesive look throughout your videos.
– Functional Layout: Arrange your space for ease of movement and efficiency. A well-planned layout helps you film smoothly while keeping your equipment organized and accessible.
– Quality Equipment Matters: Invest in good cameras, microphones, and tripods. These tools can elevate your production quality and reduce post-editing time, making your work more professional.
– Personal Touches: Add elements that reflect your personality and interests. Personalizing your backdrop with decor or themes keeps your studio unique and engaging for viewers.
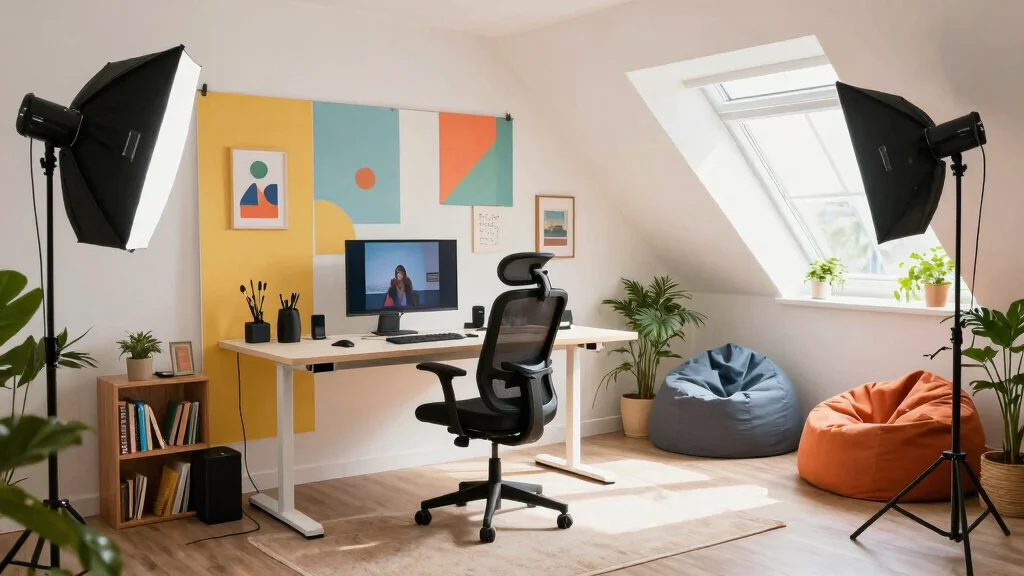
1. Optimize Lighting for Stunning Shots
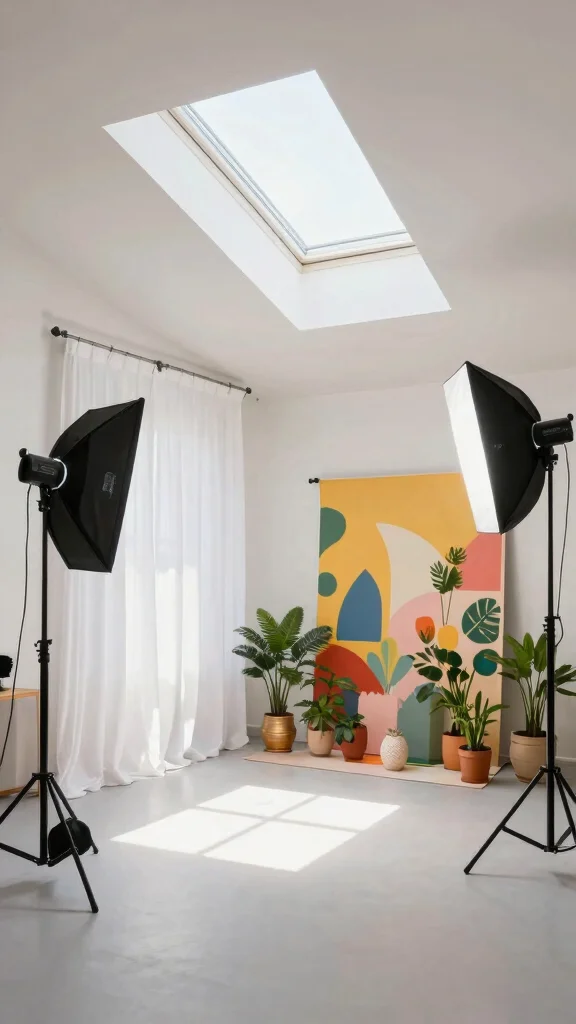
Lighting is the soul of your videos, and optimizing it in your attic is crucial. Natural light can create a warm atmosphere, making your content feel inviting. Installing large windows or skylights can fill your space with sunshine, enhancing every shot. For evening shoots, consider softbox lights or ring lights, which mimic daylight beautifully and reduce harsh shadows. Experimenting with light positions can help you find the perfect setup, and colored gels can add a fun twist to your aesthetics.
To make the most of your lighting setup, consider these tips:
– Use a white curtain to diffuse direct sunlight.
– Position lights at eye-level for a more natural look.
– Keep a consistent color temperature for cohesive footage.
– Invest in a light meter to measure light intensity accurately.
– Create a soft ambiance with LED string lights for casual vlogs.
This thoughtful approach to lighting not only elevates your video quality but also enhances the overall viewing experience, making your content stand out.
Optimize Lighting for Stunning Shots
Editor’s Choice

UBeesize 12” LED Ring Light with 62” Tripod Stand, Selfie Ring Light f…

Lystaii 9pcs Gel Light Filter Color Correction Colored Overlays Transpar…
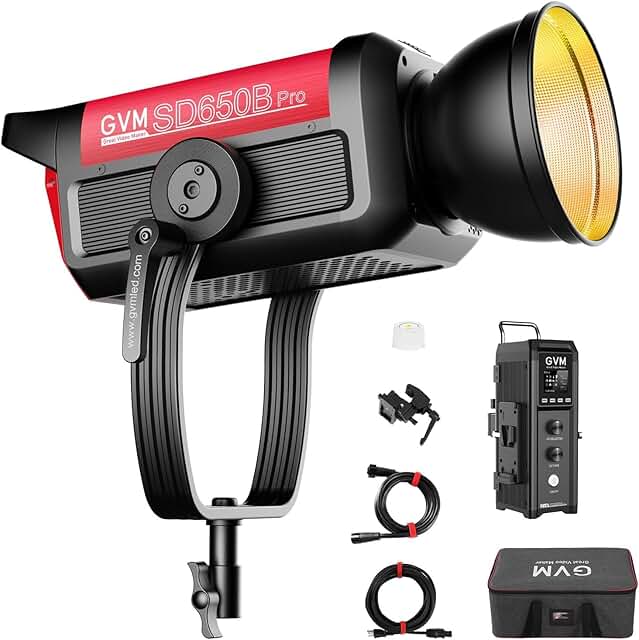
GVM Pro SD650B 650W Led Video Light, Studio Light with Bowen Mount, 8130…
2. Choose the Perfect Color Palette
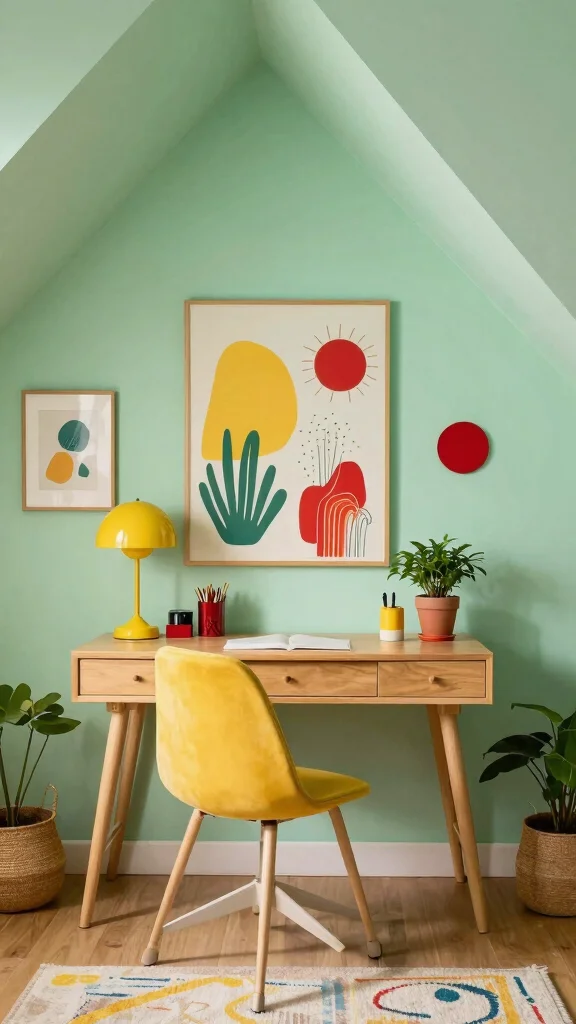
The right color palette can transform your attic studio into a captivating space. Bright colors can energize your environment, while soft pastels create a calming influence. Think carefully about how your chosen hues reflect your brand and connect with your audience. Using a mix of wall paint and decor can amplify your desired mood. Accent walls with unique textures, like wood paneling or wallpaper, can add depth and character to your setup.
Here are some suggestions to help you pick the perfect colors:
– Choose a primary color for the walls and complementary colors for decor.
– Use removable wallpaper for easy updates or changes.
– Incorporate colorful cushions or throws to add personality.
– Consider mood lighting with colored bulbs to change the ambiance.
– Keep the color palette consistent across different parts of your studio to maintain a professional look.
A well-chosen color scheme can significantly enhance your filming space, creating a visually cohesive and appealing atmosphere that resonates with your viewers.
📹 Related Video: How to Apply a Color Palette to Your Design – Tutorial
Choose the Perfect Color Palette
Editor’s Choice

Art3d Smoothing Tool Kit for Applying Peel and Stick Wallpaper, Vinyl Ba…


Nicpro 14 Colors Large Bulk Acrylic Paint Set (16.9 oz,500 ml) Rich Art …
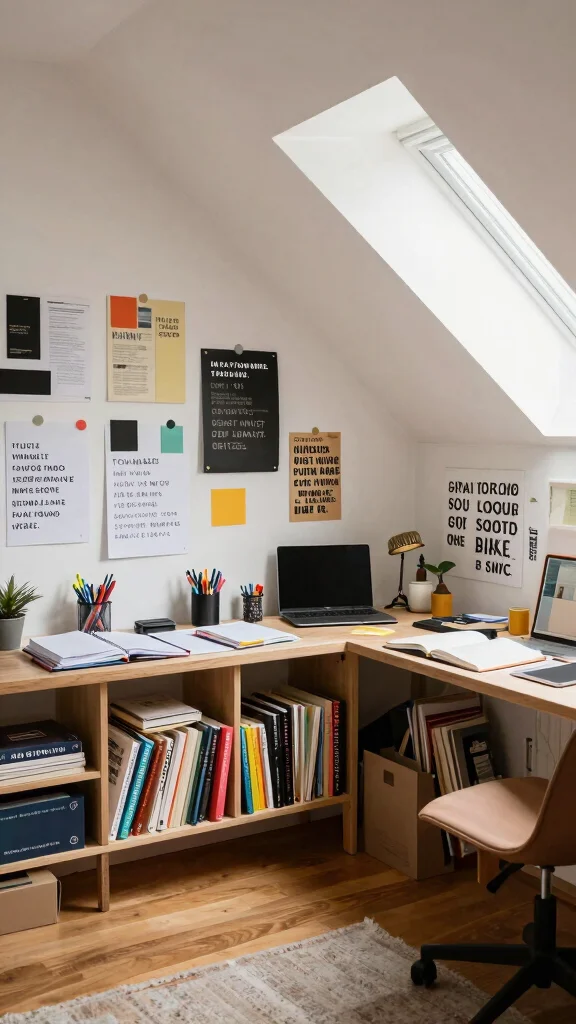
3. Create a Functional Layout
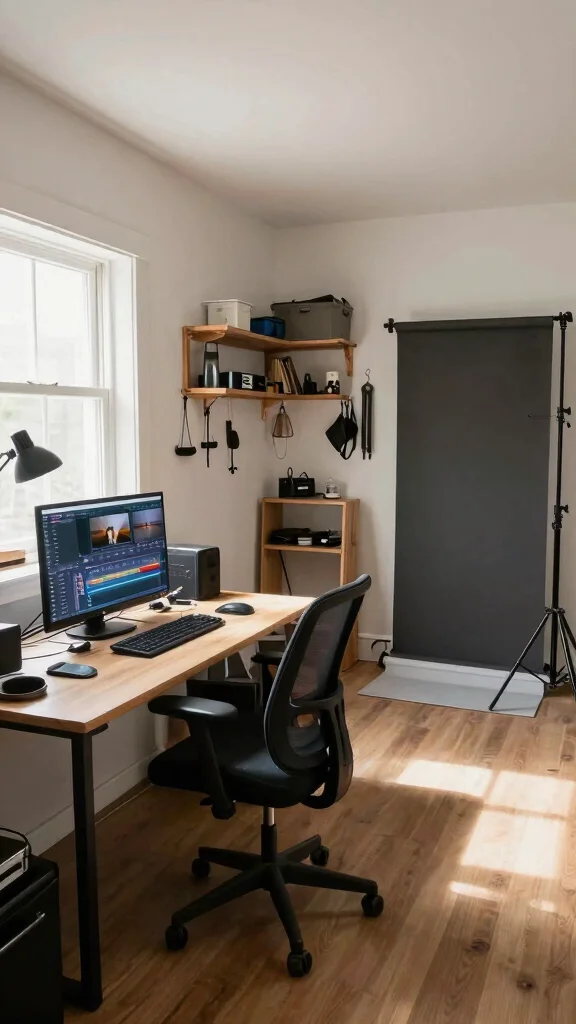
A thoughtful layout can make all the difference in your attic studio. Consider your filming style—whether you prefer sitting or standing—and arrange your furniture to facilitate a smooth workflow. Keep essential equipment within easy reach to streamline your process. Creating distinct zones for filming, editing, and brainstorming can enhance productivity.
Implement these layout tips for optimal functionality:
– Position your filming area near power outlets and natural light sources.
– Create a separate editing nook with comfortable seating.
– Use storage units to keep equipment organized and out of sight.
– Designate a prop corner for quick access to items during filming.
– Keep the area clutter-free to maintain focus and creativity.
A well-planned layout not only boosts efficiency but also nurtures your creative flow, making your attic studio a true haven for content creation.
In an attic YouTube studio, layout is everything. Create clear zones for filming, editing, and brainstorming, and place your filming area near power outlets and natural light. With a thoughtful layout, your attic space becomes a high‑efficiency workspace you’ll actually enjoy.
Create a Functional Layout
Editor’s Choice

NEEWER 79″/200cm Video Tripod, Heavy Duty Aluminum Alloy Camera Tripod S…

IRIS USA 6 Qt. Craft Storage Bins with Lids, 4-Pack, |Made in USA|, Clip…

Marsail Ergonomic Office Chair: Office Desk Chair with High Back Mesh an…
4. Invest in Quality Equipment

To take your YouTube content to the next level, investing in quality equipment is essential. Start with a camera that fits your style—DSLRs offer versatility, while high-end smartphones can also deliver stunning results. A sturdy tripod ensures your shots are stable, while a good microphone captures crisp audio. Don’t forget about additional accessories, such as lighting and backdrops, to elevate your production quality.
Here’s a list of essential equipment to consider:
– A DSLR camera or high-end smartphone for filming.
– A tripod with adjustable height and fluid head for smooth panning.
– A shotgun or lavalier microphone for superior audio.
– Softbox lights or LED panels for professional lighting.
– External hard drives for ample storage and backup.
– A green screen for versatile editing options.
– Video editing software to polish your final product.
Quality equipment makes a significant difference in your content, enhancing both visual and audio aspects for a more professional finish.
Invest in Quality Equipment
Editor’s Choice

Logitech Creators Blue Yeti USB Microphone for PC, Mac, Gaming, Recordin…

NEEWER 700W Equivalent Softbox Lighting Kit, 2Pack UL Certified 5700K LE…

5K Video Camera Camcorder, UHD 64MP Vlogging Camera for YouTube with 3″ …
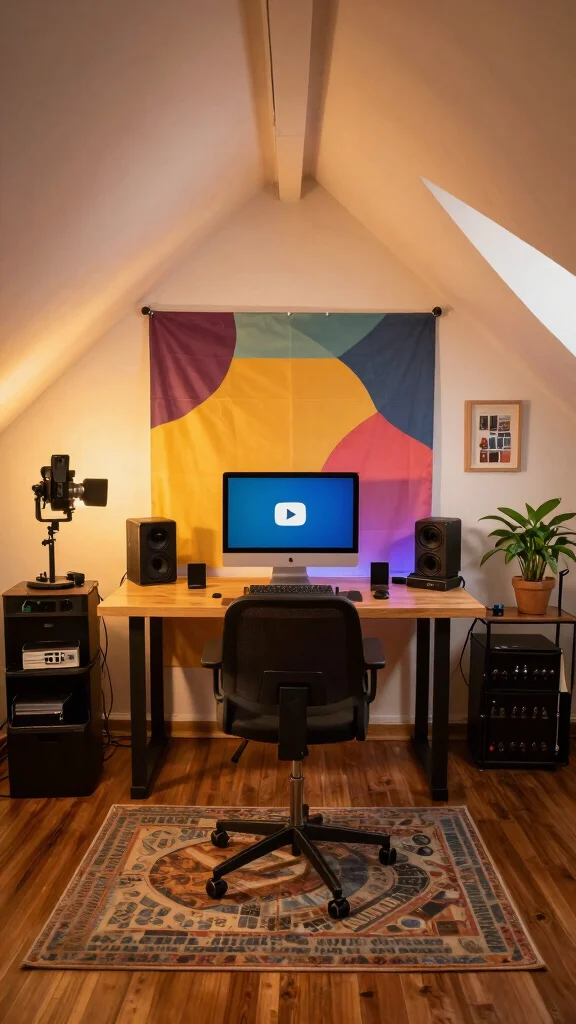
5. Personalize Your Backdrop
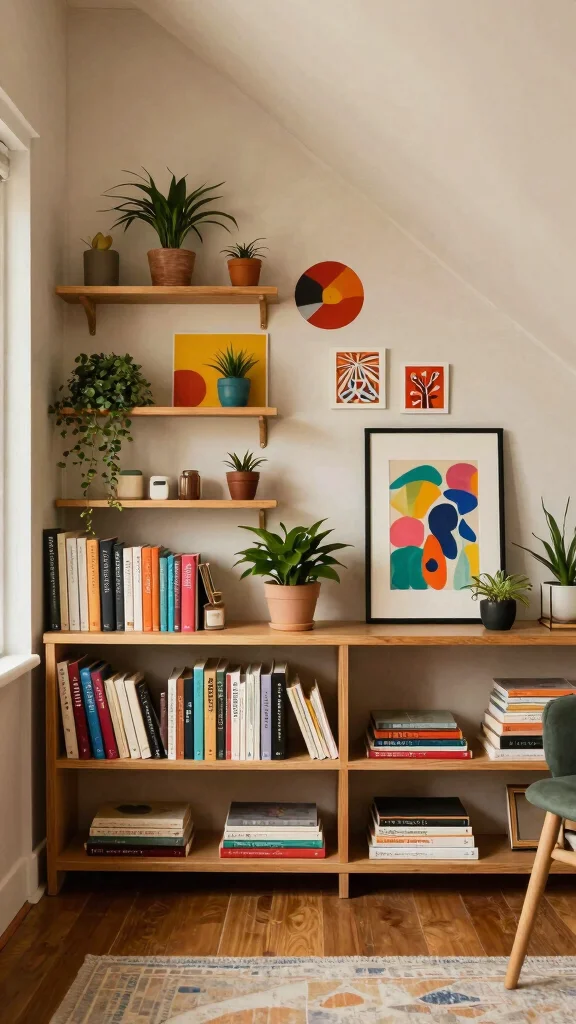
Your backdrop is crucial for crafting a distinct identity for your videos. It should capture your essence while appealing to your audience. Using personal items like books, plants, or art that resonate with you can create a visually engaging setting. A clean, organized backdrop contributes to a professional look, while unique elements inspire creativity. Consider rotating displays of your work or projects to keep your backdrop fresh and interesting.
Here’s how to create an eye-catching backdrop:
– Use a fabric or paper backdrop in a color that complements your theme.
– Install shelves to display personal items or decor that represent you.
– Incorporate greenery for a lively, inviting touch.
– Keep the area behind you tidy and uncluttered during filming.
– Regularly update your backdrop to surprise your audience and keep things interesting.
A personalized backdrop not only enhances your videos but also makes your space feel more like home, fueling your creative energy.
You might also like
Personalize Your Backdrop
Editor’s Choice

CSFOTO 7x5ft Watercolor Graffiti Abstract Backdrop Modern Abstract Oil P…

Furinno Jaya Book Shelf, 5-Tier Bookshelf, Bookcase with Adjustable Shel…

Winlyn Set of 3 Artificial Succulent Plants in Black Concrete Pots Faux …
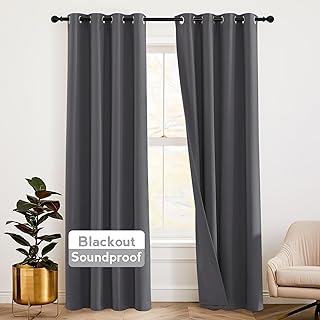
6. Soundproofing Your Attic
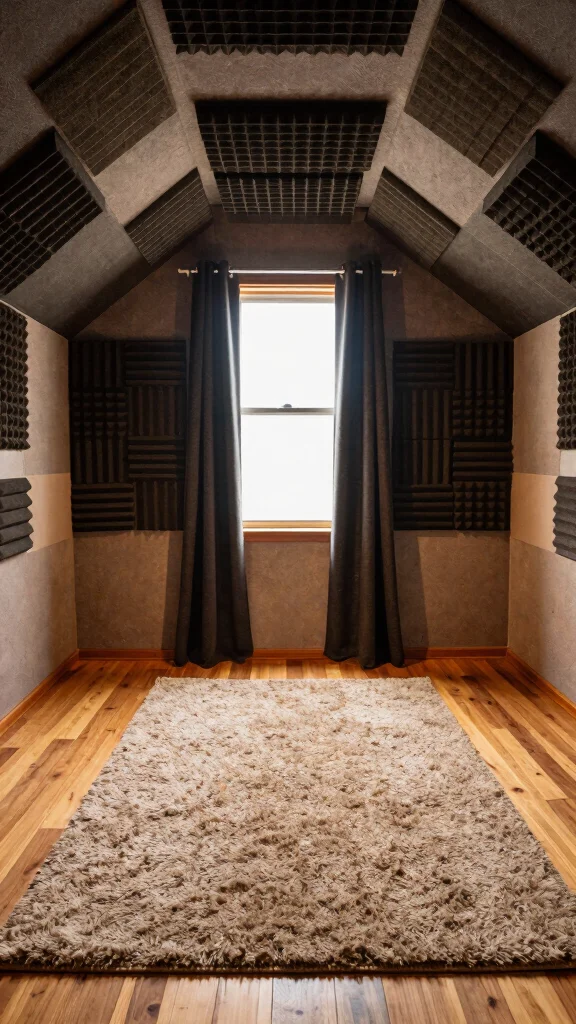
Great audio quality is just as vital as visuals, making soundproofing a priority for your attic studio. Attics can be noisy, so minimizing distractions is key. Adding soundproofing panels can help absorb sounds and reduce echoes. Soft furnishings like rugs and curtains can also aid in sound dampening while enhancing the aesthetic appeal. Simple additions like thick curtains can effectively block external noise.
Here are some tips for soundproofing:
– Use foam panels in the corners for maximum effect.
– Hang thick curtains over windows to reduce outside noise.
– Add carpets or large area rugs to absorb sounds.
– Position furniture strategically to create barriers against noise.
– Ensure doors and windows seal tightly to avoid sound leaks.
Effective soundproofing not only improves your audio quality but also creates a serene environment for your creative process.
Soundproofing Your Attic
Editor’s Choice
RYB HOME Soundproof Curtains 84 inches – 3 Layers Blackout Curtains Nois…

TroyStudio Thick Sound Absorbing Interlocking Floor Mats, 16 Pcs 11x 11 …

Focusound 52 Pack Acoustic Foam Panels 1″ x 12″ x 12″ Sound Proof Foam P…
7. Set Up a Content Calendar
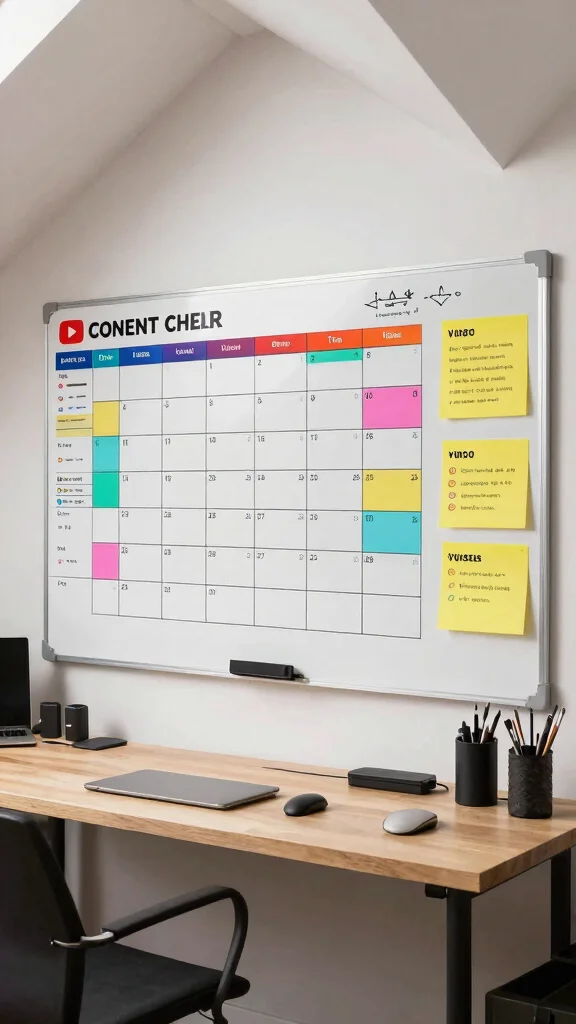
A content calendar is vital for maintaining organization and consistency in your YouTube uploads. It allows you to plan topics, filming dates, and publishing schedules effectively. Whether you use a simple whiteboard or a digital tool, a calendar helps streamline your workflow. Keeping it updated ensures you stay ahead of trends and keep your content fresh.
Consider these tips for effective content planning:
– Brainstorm topics that resonate with your audience and reflect your style.
– Schedule time for filming, editing, and promotion.
– Break down larger projects into manageable tasks.
– Track video performance to understand what works best.
– Use reminders to stay on top of deadlines and release dates.
A content calendar not only keeps you organized but also enhances your ability to create engaging content that resonates with your viewers.
Set Up a Content Calendar
Editor’s Choice

MaxGear Monthly Calendar Dry Erase Board for Wall, 16″x12″ Small Hanging…

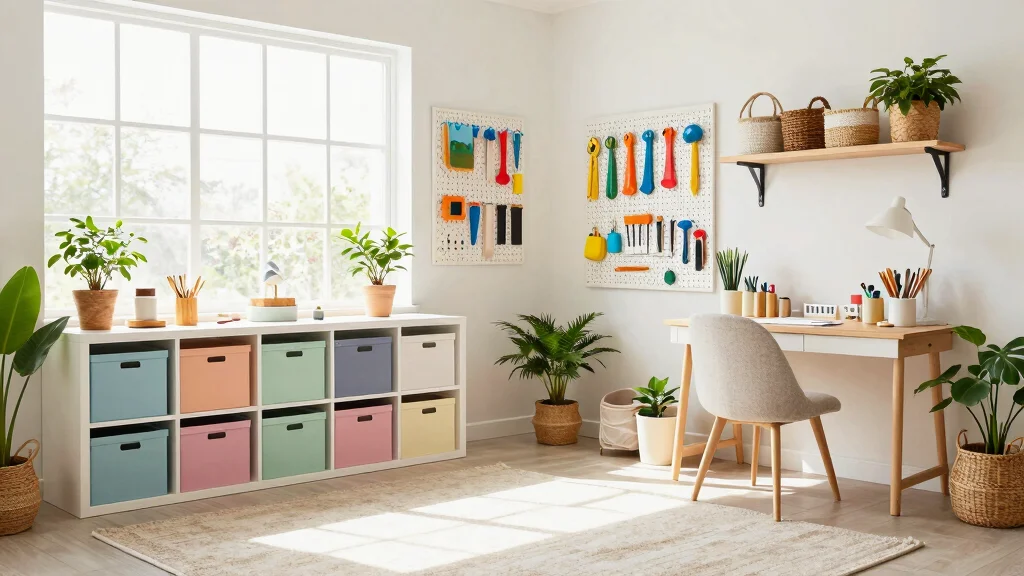
8. Incorporate Creative Storage Solutions
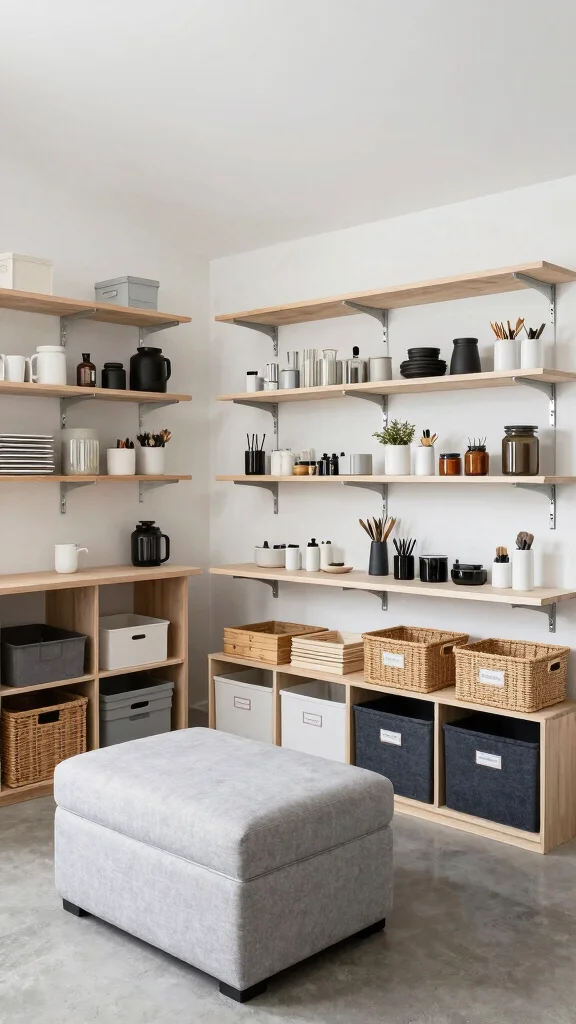
Storage can be a challenge in attic spaces, but the right solutions can keep your studio organized. Consider multifunctional furniture, like ottomans with hidden storage or decorative shelving that doubles as display space. Clear bins help you easily find props and equipment while keeping everything tidy. Labeling is essential for ensuring that every item has a designated spot.
Here are some creative storage ideas:
– Use wall-mounted shelves to maximize vertical space.
– Install pegboards for easy access to tools and supplies.
– Incorporate baskets or bins for a stylish yet organized look.
– Utilize under-desk storage solutions to keep the area clutter-free.
– Regularly declutter and replace items that no longer serve a purpose.
Creative storage solutions not only enhance functionality but also contribute to an inspiring and organized workspace.
Decluttering attic storage for your YouTube studio isn’t a dream—it’s a DIY win. Use wall-mounted shelves and labeled bins to keep props organized and storage easy in minutes, not hours. When every item has a home, your creative flow and lighting shine.
Incorporate Creative Storage Solutions
Editor’s Choice

YIHONG 6 Pack Clear Pantry Organizer Bins, Plastic Containers with Handl…

Folding Storage Ottoman Bench, Multi-Functional Ottoman Foot Rest, End o…

Deep Floating Wall Shelves – 4 Sets of 12 Inch Wide Black Wood Shelves f…
9. Add Personal Touches
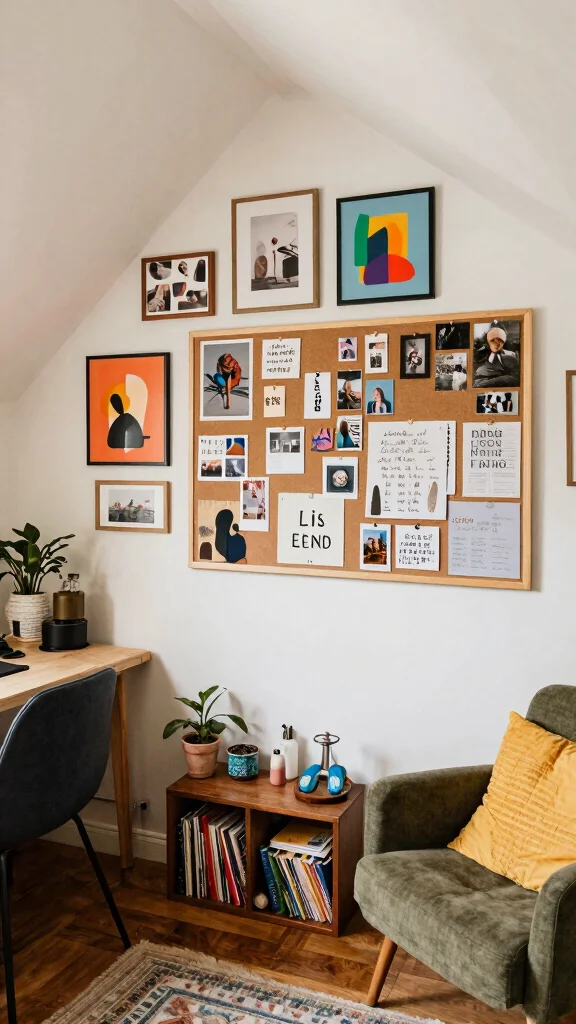
Personalizing your attic studio brings warmth and inspiration to your creative space. Incorporate elements that truly reflect your personality and passions. Artwork, travel souvenirs, or personal photographs can spark creativity and make your studio uniquely yours. Consider creating a vision board filled with your goals to keep you motivated.
Suggestions for personalizing your studio:
– Hang framed photos or artwork that resonates with you.
– Include quotes or affirmations that inspire your creativity.
– Create a small gallery wall of your favorite memories.
– Use personal mementos to spark joy and inspiration.
– Regularly update items to keep the studio feeling fresh and aligned with your current interests.
Adding personal touches not only enhances your space but also fuels your creative spirit, making it a place where inspiration flows freely.
How To Choose The Right Equipment for Your Attic YouTube Studio
When creating a professional YouTube studio in your attic, choosing the right equipment is crucial for producing high-quality content. The equipment you select will affect your video’s lighting, sound, and overall visual appeal. Here’s how to make the best choices for your attic studio.
1. Camera Selection
Choose a camera that fits your content style and budget. For beginners, a smartphone with a good camera can work wonders. If you aim for a more professional look, consider DSLRs or mirrorless cameras. Look for features like 1080p or 4K capability to ensure your videos are crisp and clear.
2. Lighting Gear
Lighting can make or break your video quality. Natural light is great, but you might need additional sources. Softbox lights are a popular option for even lighting. Ring lights are also effective, especially for beauty or close-up shots. Aim to create a well-lit space that minimizes shadows.
3. Audio Equipment
Good audio is essential for engaging videos. Built-in camera microphones often lack quality. Consider investing in an external microphone, like a lavalier or shotgun mic, to enhance sound quality. Test your audio setup before filming to avoid unpleasant surprises.
4. Tripods and Stabilizers
Stability is key for professional-looking videos. A sturdy tripod will keep your camera steady and help with framing. For movement shots, a gimbal stabilizer can create smooth, cinematic effects. Make sure to choose equipment that is compatible with your camera type.
5. Editing Software
Editing plays a vital role in video production. Choose software that suits your skill level. Beginners might start with free options like iMovie or HitFilm Express. More advanced users may prefer Adobe Premiere Pro or Final Cut Pro for greater control over their projects.
6. Storage Solutions
Video files can take up a lot of space. Make sure you have ample storage options, like external hard drives or cloud solutions. Aim for at least 1TB to start. Having a solid backup plan will help prevent data loss and keep your studio running smoothly.
Pro Tip: Always test your equipment and setup before a shoot. Familiarize yourself with your gear to ensure everything runs smoothly during your filming sessions. A little preparation can go a long way in saving time and reducing stress.
Add Personal Touches
Editor’s Choice

CHDITB Motivational Quotes Frame Canvas Wall Art, Inspirational Wall Dec…
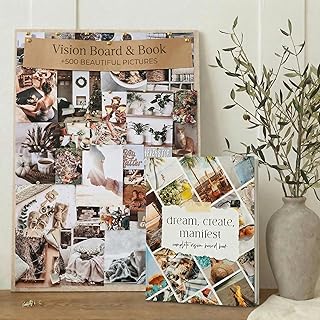
Inspirational Vision Board Kit – Complete Set with Vision Board Book &…

Vittanly 15 Pack Picture Frames Collage Wall Decor for Mounting or Table…
10. Always Stay Inspired
Maintaining inspiration is crucial for any YouTube creator, and your attic studio should foster creativity. Surround yourself with motivational quotes, favorite books, or artwork that ignites your passion. Regularly refreshing your decor or themes keeps the environment dynamic and engaging. Set aside time for creative brainstorming or join local workshops to gather new ideas.
Here are ways to nurture your creativity:
– Dedicate a corner for creative brainstorming with supplies like notebooks and pens.
– Attend workshops or online classes to learn new skills and techniques.
– Follow other creators for inspiration while developing your unique style.
– Incorporate elements like music or nature sounds to stimulate creativity.
– Regularly evaluate your goals and adapt to stay motivated.
Cultivating a space that continually inspires you can lead to amazing content and a fulfilling creative journey.
Fun fact: creators who refresh their attic youtube studio decor monthly report a 30% boost in ideas. A refreshed space can shave hours off setup, keeping inspiration from drying up.
Always Stay Inspired
Editor’s Choice

Mr. Pen- Creative Journaling Kit, 300-Piece Set for Bullet Point Journal…

KREATIVE ARTS Imagine with All Your Mind Canvas Quotes Wall Art Prints -…

TORCHSTAR Metal Desk Lamp with Clamp, Swing Arm, Architect Adjustable Go…
Conclusion
Transforming your attic into a YouTube studio can be a fun and fulfilling process that reflects your unique style and enhances your content.
By implementing these creative ideas, you can craft a space that not only looks great on camera but also inspires you to create quality videos consistently. Embrace the journey of creating your dream attic studio, and don’t forget to make it a place where your creativity can flourish.
Note: We aim to provide accurate product links, but some may occasionally expire or become unavailable. If this happens, please search directly on Amazon for the product or a suitable alternative.
This post contains Amazon affiliate links, meaning we may earn a small commission if you purchase through our links, at no extra cost to you.
Frequently Asked Questions
What are the essential steps to turn an attic into a professional YouTube studio (attic youtube studio)?
Start with a quick space audit for your attic youtube studio: check headroom, egress, and attic ventilation. Then sketch a layout that fits your filming needs. Improve acoustics with simple measures: rugs, curtains, and affordable foam panels. Upgrade electrical outlets and lighting, plan a quiet HVAC solution, and pick a color scheme that matches your brand. Set up a reliable home studio setup: camera, tripod, mic, and backdrop. Keep cable management neat with clips and raceways. These attic renovation ideas help you create a clean, creative workspace that shines on every YouTube filming tips.
Which attic design ideas help create a creative workspace that looks professional on video?
Aim for a balanced palette, good storage, and a backdrop that screams ‘you’. Use bright but soft colors, sound-absorbing panels, and a dedicated filming corner. Install adjustable lighting and a simple shelf system to display gear. Consider window treatments for controlled natural light. This attic design ideas approach makes your creative workspace photographable and scalable for future videos, keeping your home studio setup polished.
What are budget-friendly tips for a home studio setup in an attic?
Start with a plan, and reuse existing furniture. Thrift-store finds can work as a desk or storage; invest in a good microphone and a couple of LED panels. Use DIY acoustic treatment like fabric-wrapped panels or thick curtains to dampen echoes. A portable backdrop or a blank wall gives you a clean shooting area. Cable management with clips keeps things neat. These attic renovation ideas show you don’t need a big budget for a polished attic youtube studio.
What lighting and soundproofing choices work best for an attic YouTube studio?
Go with a three-point lighting setup: key, fill, and backlight using daylight-balanced LEDs for your attic youtube studio. Add a softbox or ring light for flattering skin tones. For sound, layer rugs, curtains, and fabric panels to reduce echo; seal gaps around doors and vents to minimize outside noise. In a small attic, mount lights overhead to keep space uncluttered, and position the camera away from noisy fixtures. These tips align with YouTube filming tips and help create a clean, professional look.
How should I plan an attic renovation for a YouTube filming setup without compromising the structure?
Start with a structural check and a local permit review if required. Plan for proper insulation and ventilation to avoid heat and moisture issues. Ensure electrical capacity for lights, cameras, and sound gear, with dedicated circuits if possible. Create a phased timeline that minimizes disruption, and work with licensed professionals for framing, insulation, and fire safety. Map a clear layout—shooting corner, storage, and gear closet—to support a smooth attic youtube studio experience. These attic renovation ideas keep safety and aesthetics at the forefront.
Related Topics
attic youtube studio
home studio setup
attic design ideas
DIY creators
creative workspace
YouTube filming tips
attic renovation ideas
budget friendly
beginner friendly
minimalist design
home decor
video production